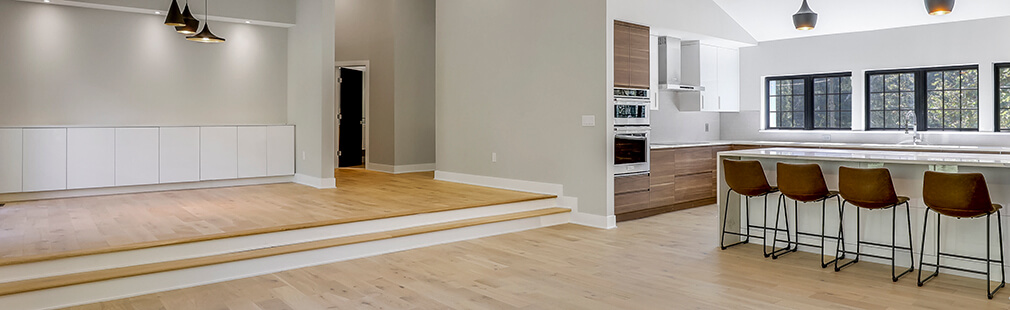
For a professional, finished look to your floor, you’ll need to consider moldings, trims, and transitional pieces. The purpose of molding is to cover edges, camouflage expansion spaces, and bridge surfaces where wood ends and other types of flooring begin, like tile or carpet. Engineered flooring often comes with matching trim, but for solid wood flooring, you’ll need to shop for these pieces. The trim is the last finishing step after the floor is completely installed, but to avoid frustrating last-minute issues it should be planned in advance as part of the overall installation.
What kind of trim will I need?
To determine what kind of trim you’ll need, consider the edges of the room and anything that meets the floor, for example installed cabinets, fireplaces, stairways, doorways, and transitions between floorings. Here is how different types of trim are used:
- Wood to tile or wood to wood: Usually, this calls for a T-molding, named because it has a rounded top T shape. The top is slightly rounded and the stem on the bottom fits between the ends of two types of flooring roughly equal in height.
- Uneven levels: If one floor surface is noticeably higher of lower than the other, a reducer is needed to eliminate the raised edge. Reducers can be one-sided, flush, bi-level or overlapping. Each type of reducer trim does the same thing, eases the transition between floors of different levels.
- Threshold: Threshold trim is used to bridge the gap between the floor and a sliding glass door while leaving an expansion gap in place, and can also be used to connect wood floors to carpet. End cap or square nose molding may also be used for this purpose.
- Stairs:If your floor will end under the floating edge of stairs and require expansion room, you’ll need overlap stair nosing or bull nose trim. Flush or square edge stair nosing may be used for stairs that end flush.
- Baseboards: around the walls, trim will be necessary to cover the gaps left by expansion space. Decorative or plain baseboards may be used, with quarter round or shoe edge molding at the bottom to conceal additional gaps.
Installation Methods:
- Baseboards and other trim may be attached to the wall every 16 inches on the studs using staples or finishing nails.
- Transitional T-moldings are usually glued in place to the subfloor. Reducer trims have a tongue and groove edge that attach to the last floorboard and overlap the edge of the next surface.Baseboards and other trim may be attached to the wall every 16 inches on the studs using staples or finishing nails.
- Overlap reducers and threshold transitional trims are commonly used with floating floors and with transitions to carpet. They overlap both edges and may be nailed or glued down.
General Tips:
- Unless you plan to paint trim to match the walls, select trim that is as close in grain pattern and color to your flooring as possible, and select wood strips that match the trim with little variation to go around the perimeter of the walls.
- Like the flooring planks, moldings should be acclimated for 72 hours.
- Pre-drilling is highly recommended to avoid splitting and splintering when fastening with nails or staples.
- Start with the longest unbroken wall, usually the outside wall.
- When installing shoe edge or quarter round moldings, do not drive in nails or staples at a downward angle. It may interfere with the floor expansion area.
- Splice trim using miter cuts. For an unbroken look, the direction of the miter should be oriented with the long point away from the room’s main entryway, the same direction of your vision as you enter the room.
Special Circumstances:
Doorways:
It’s tempting to continue flooring through a doorway, but using a transition (T-molding) is usually a better option. Creating an exact fit is difficult, and using a molding allows a little extra expansion easement. If the flooring is floated, you must use a transition molding if the doorways is less than 6 feet wide.
Pipes, vents, cabinets and other fixed objects:
A general rule of thumb is to leave a 3/8” expansion gap around any fixed object and use moldings, pipe rings, or vent covers to conceal the gaps.
Raised Hearths:
Transitions around fireplaces are often awkward. The most natural looking way to handle a raised hearth is to trim out an area around the hearth itself using an undercut saw with a diamond-tipped blade. Two cuts are required and this needs to be prepared before installing the floor. The first cut goes at the vertical height level of the floor and the second flush with the subfloor. Chisel the area between the two cuts for the flooring to slide between.